Mainboard RGB Fan Control with OpenRGB
Finally following up on my previous post about the coolmoon controller mod, this post shows how to connect it with a mainboard header and do cool (pun intended) animations with OpenRGB.
Hardware Setup
First of all a mainboard is required that has at least one header for 5V addressable RGB LEDs. I upgraded to an Gigabyte B550 Aorus Pro V2 and that what I am using for this project, it can provide up to 5A and control 1000 LEDs. As case I have a Fractal Design Meshify C Dark.
Mainboard Connection
The header connector cable to the previously made fan hub is really simple:
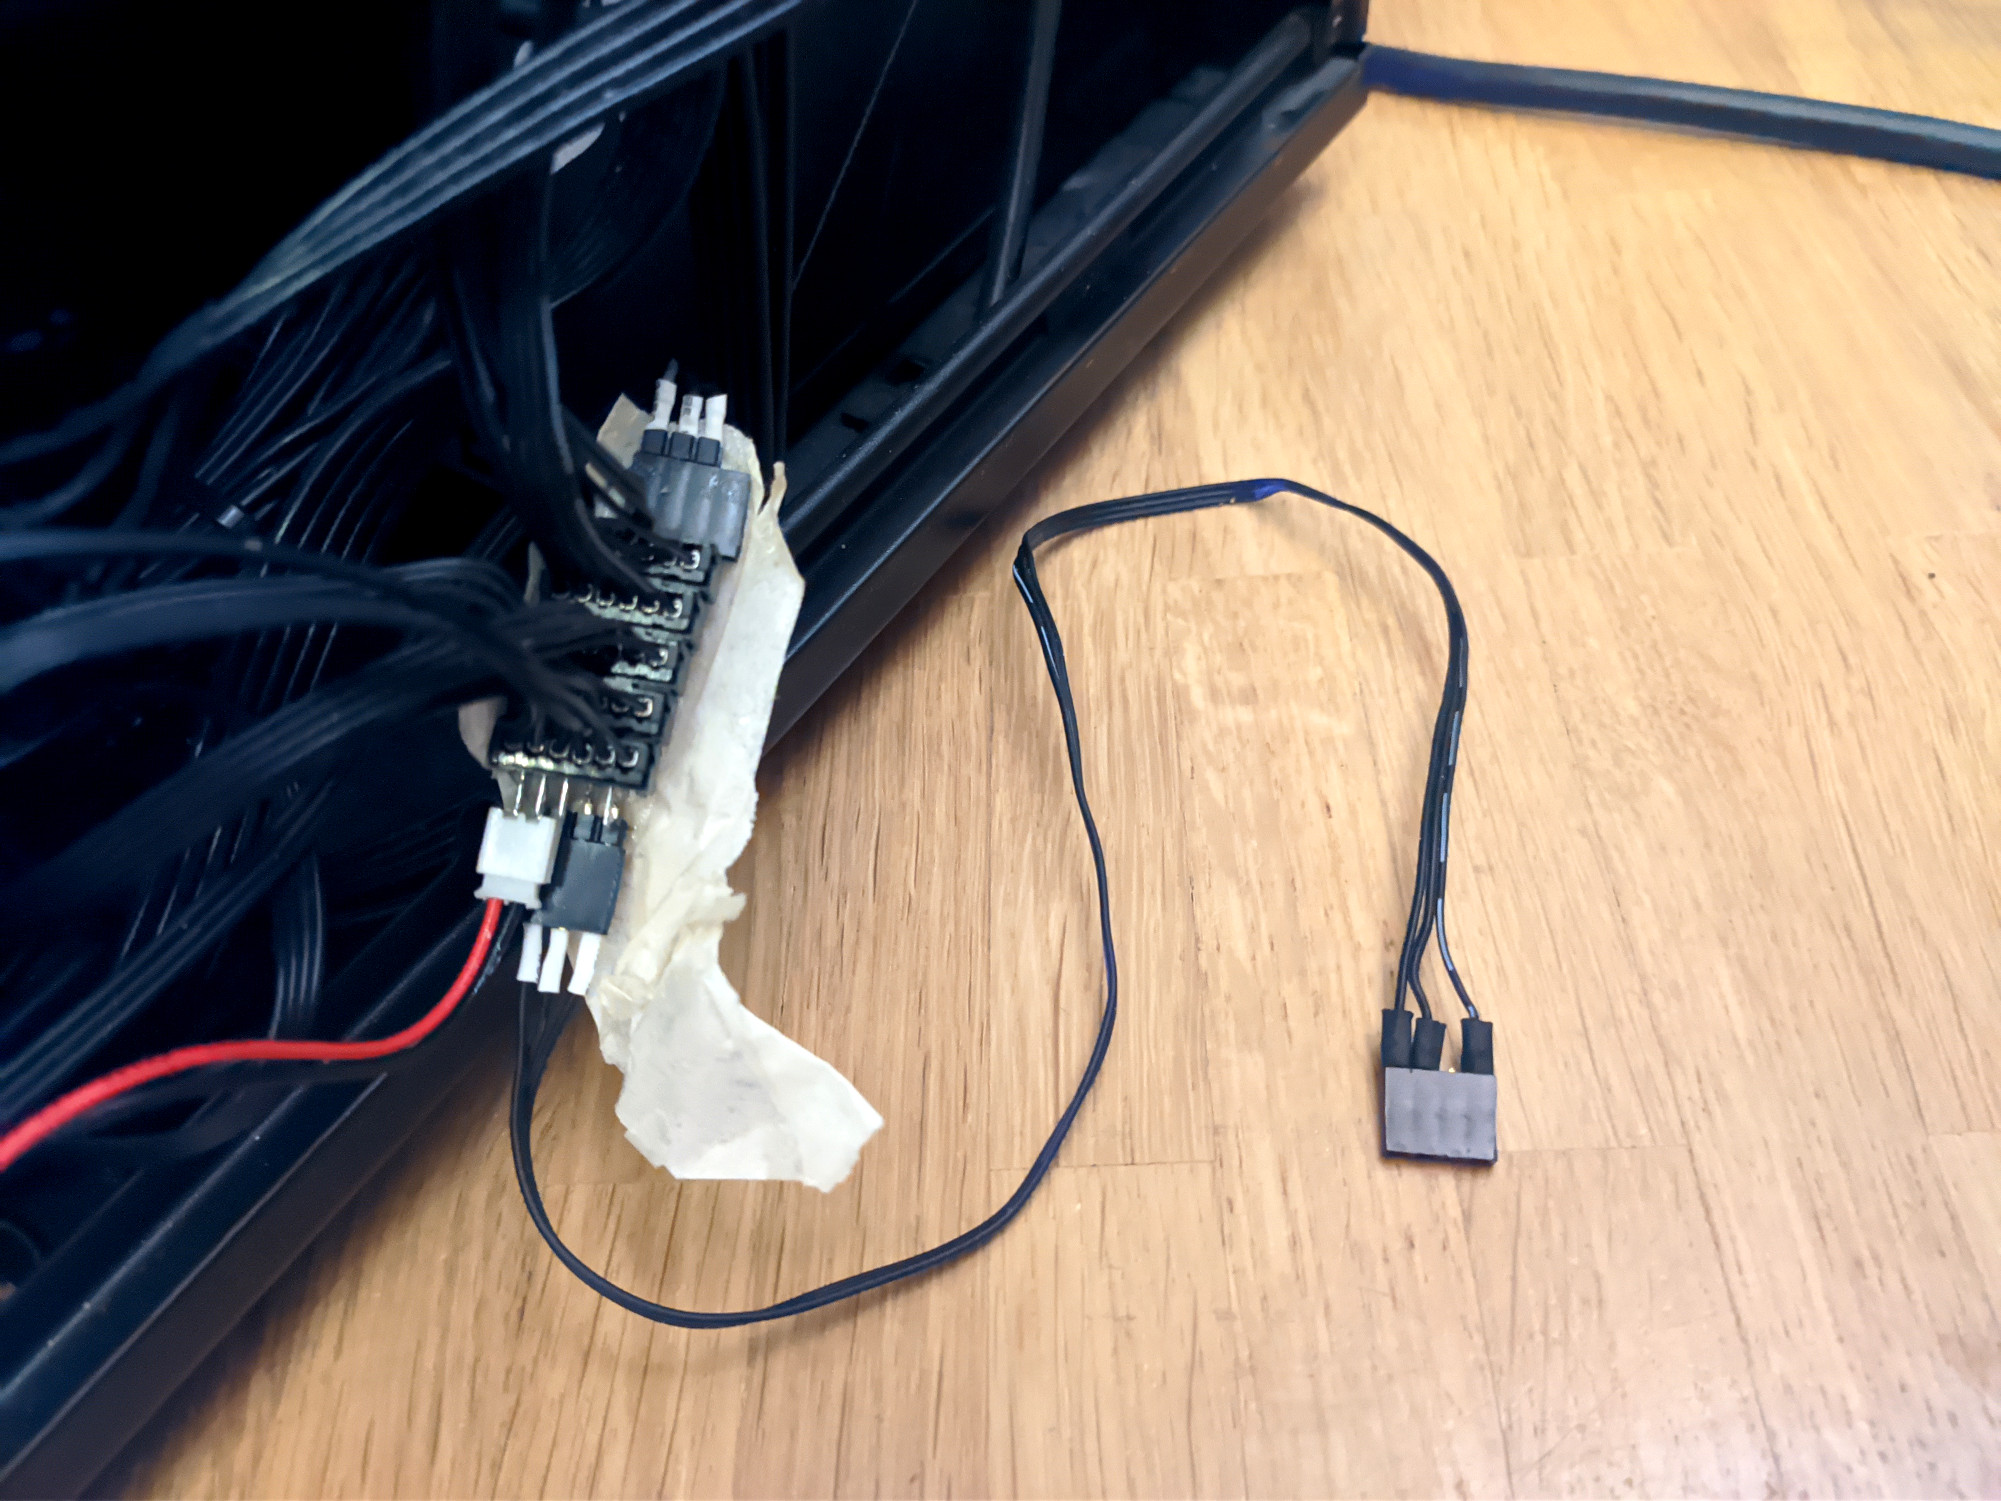
For the mainboard side I cut a 4 pin piece from a standard 0.1 in (2.54 mm) pitch header bar. Actually only 3 pins are used, they use a wider header and don’t equip one pin to make wrong connections impossible, as wrong polarity would most certainly destroy the fans.
Then it goes to the 3 pin input directly:
| Nr. | MainBoard Pin | LED Pin |
|---|---|---|
| 1 | v (5V) | +5V |
| 2 | Data | Data in |
| 3 | No Pin | - |
| 4 | GND | GND |
I wrapped some tape around the hub, so the exposed solder joints can’t touch anything, which could otherwise cause a short circut with other parts in the case.
You can also see the cable in the output port, this is for the following part.
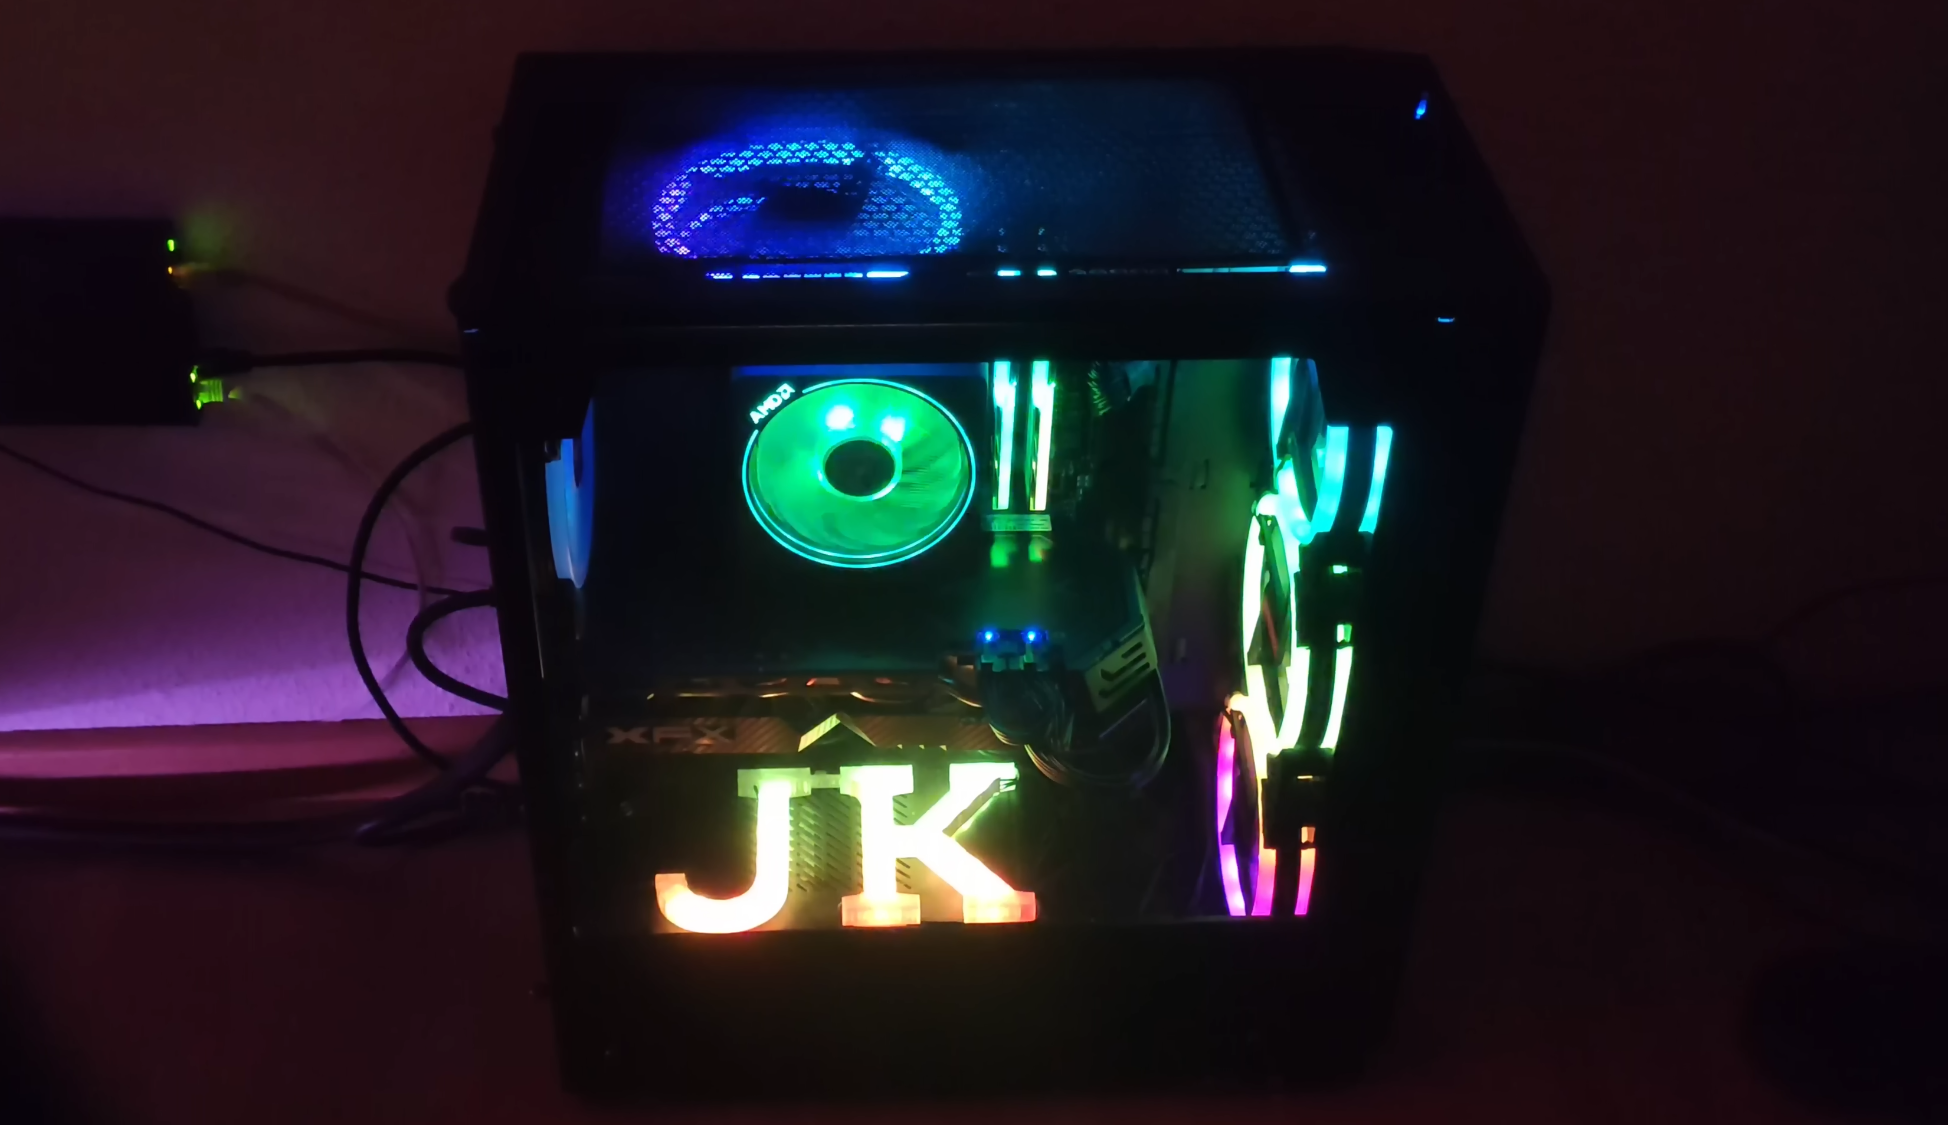
3D printed sign
In addition to the normal fan I though it would be nice to have an custom sign with some letters from my name. Idea was to use compatible WS2812B strip part to illuminate it.
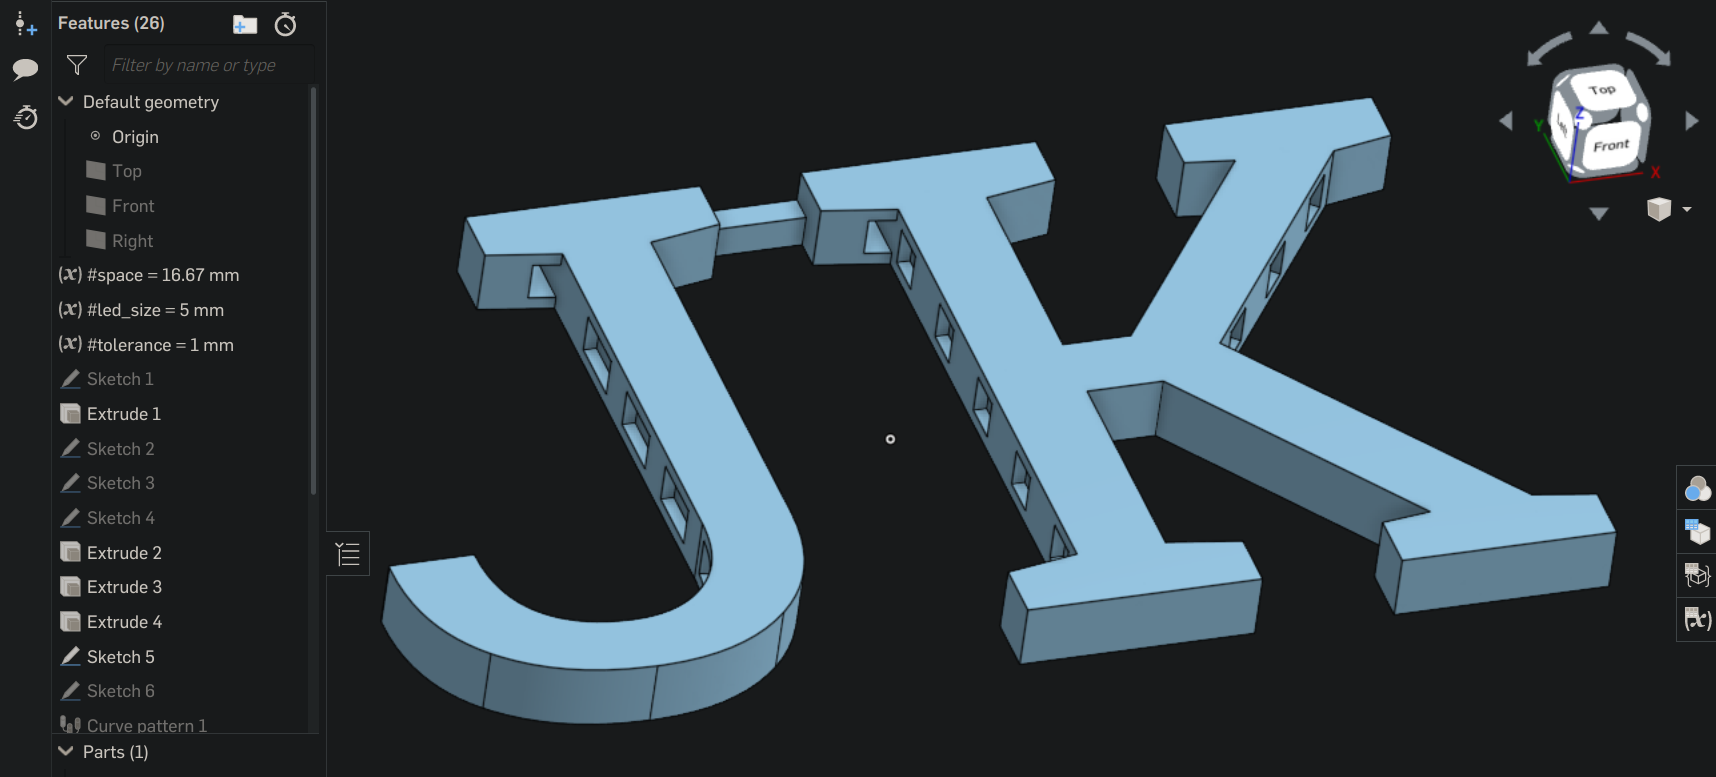 Overall there are 17 LEDs (6+5+6) in the so called 5050 format, meaning 5 x 5 mm LEDs.
Then I printed it in transparent PETG, cut 3 pieces of the LED strip, joined then with some 3 pin cables and secured everything to the sign with a bit of hot glue:

To my surprise the first revision already fitted well to LEDs. This is mainly because I could put in high tolerances, especially on the “J” bend part, after the strip is put on the holes are not visible anyway.
OpenRGB configuration
Now to the software part. OpenRGB is very powerful open source control program, that supports not only the RGB header, but also for example the popular Trident Z RGB RAM and AMD CPU cooler.
Plugins
We need 2 plugins for the following setup. Installation is done through settings - plugins - install plugin (button) - select the downloaded package:
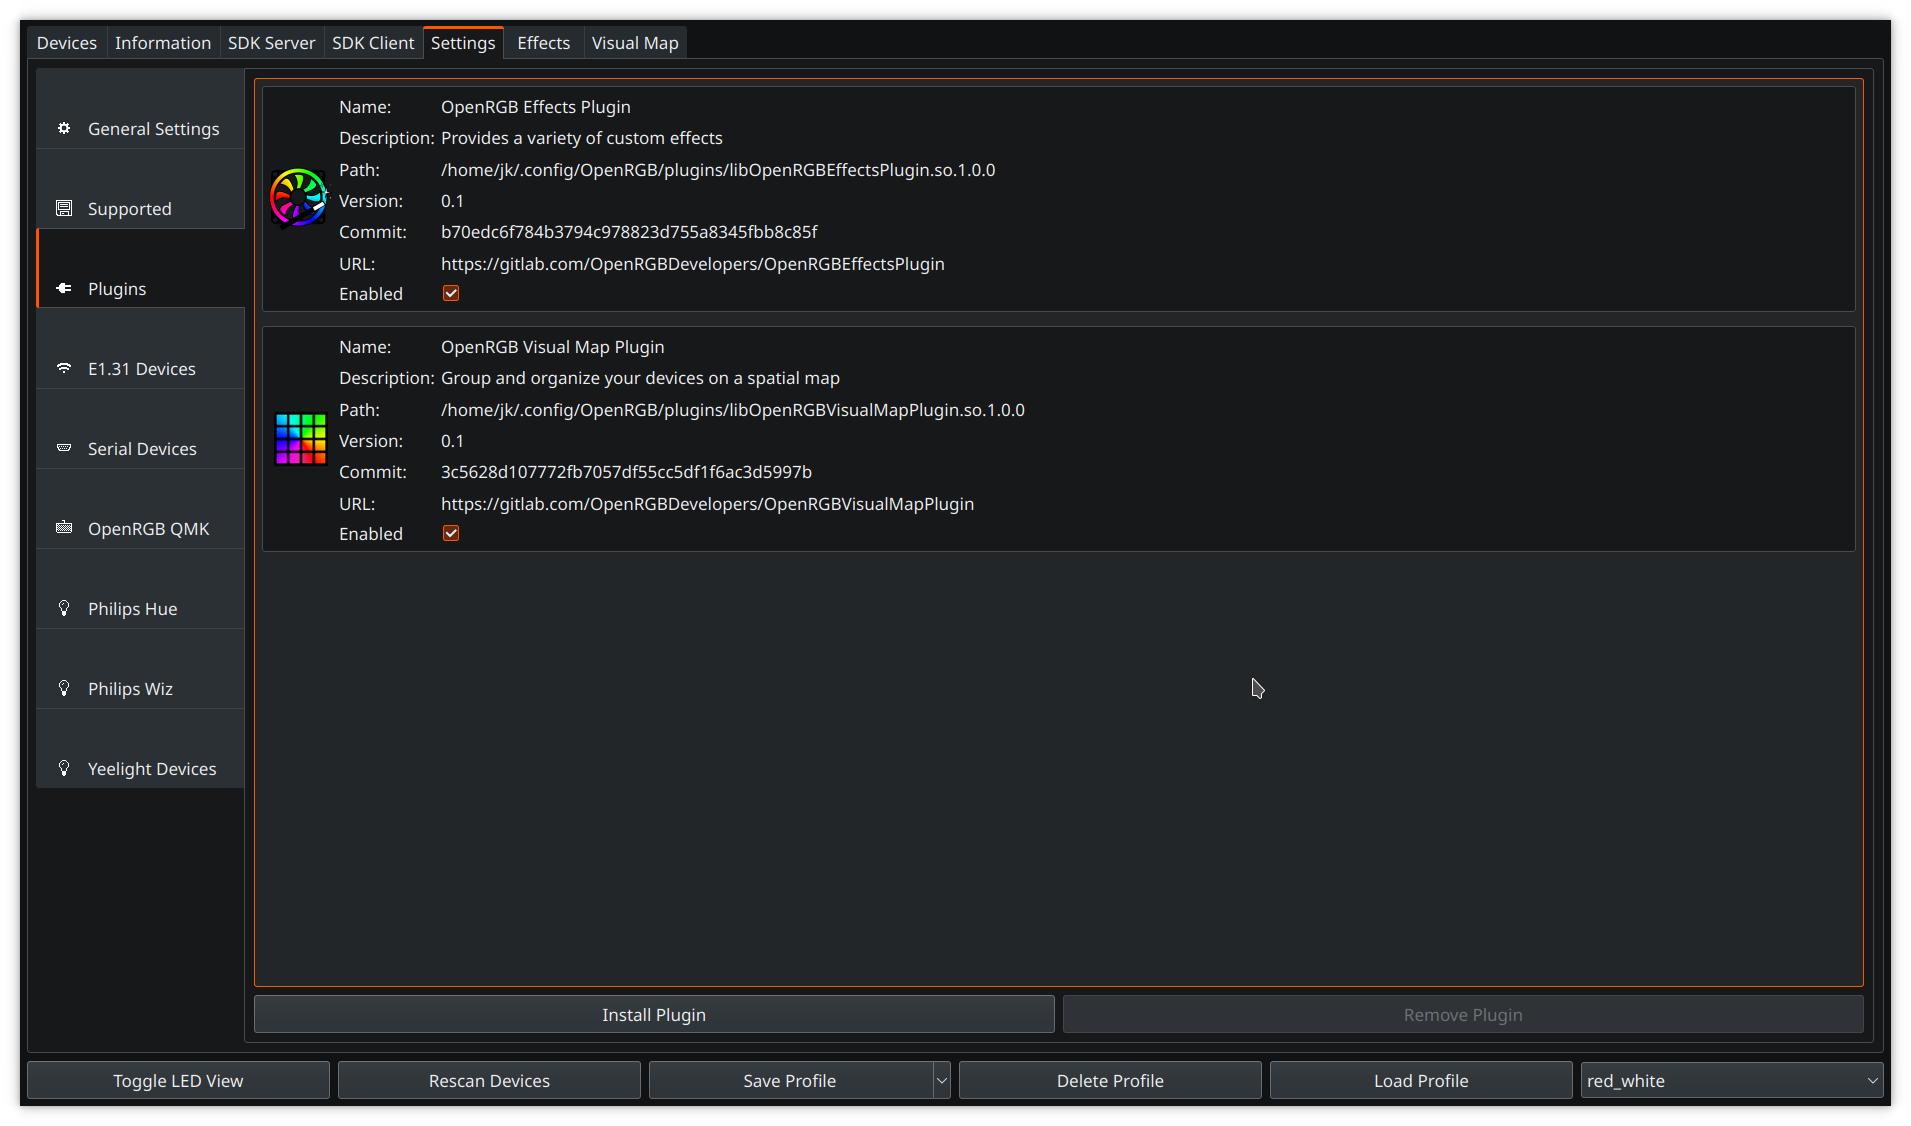
Successfully installed plugins show up as additional tabs on the top.
Visual Map
Adds an interface to organize the LEDs in a virtual space, like they are physically installed. Really crucial to to get a proper picture with these fans that wrap sequentially addressed LED strips around circles. https://gitlab.com/OpenRGBDevelopers/OpenRGBVisualMapPlugin
Effects
This adds various animation, vanilla openRGB has only manual control. https://gitlab.com/OpenRGBDevelopers/OpenRGBEffectsPlugin
Fans + sign
The mainboard header get’s auto detected on startup. Only thing to do is to tell the software how many LEDs are connected, with a click on resize:
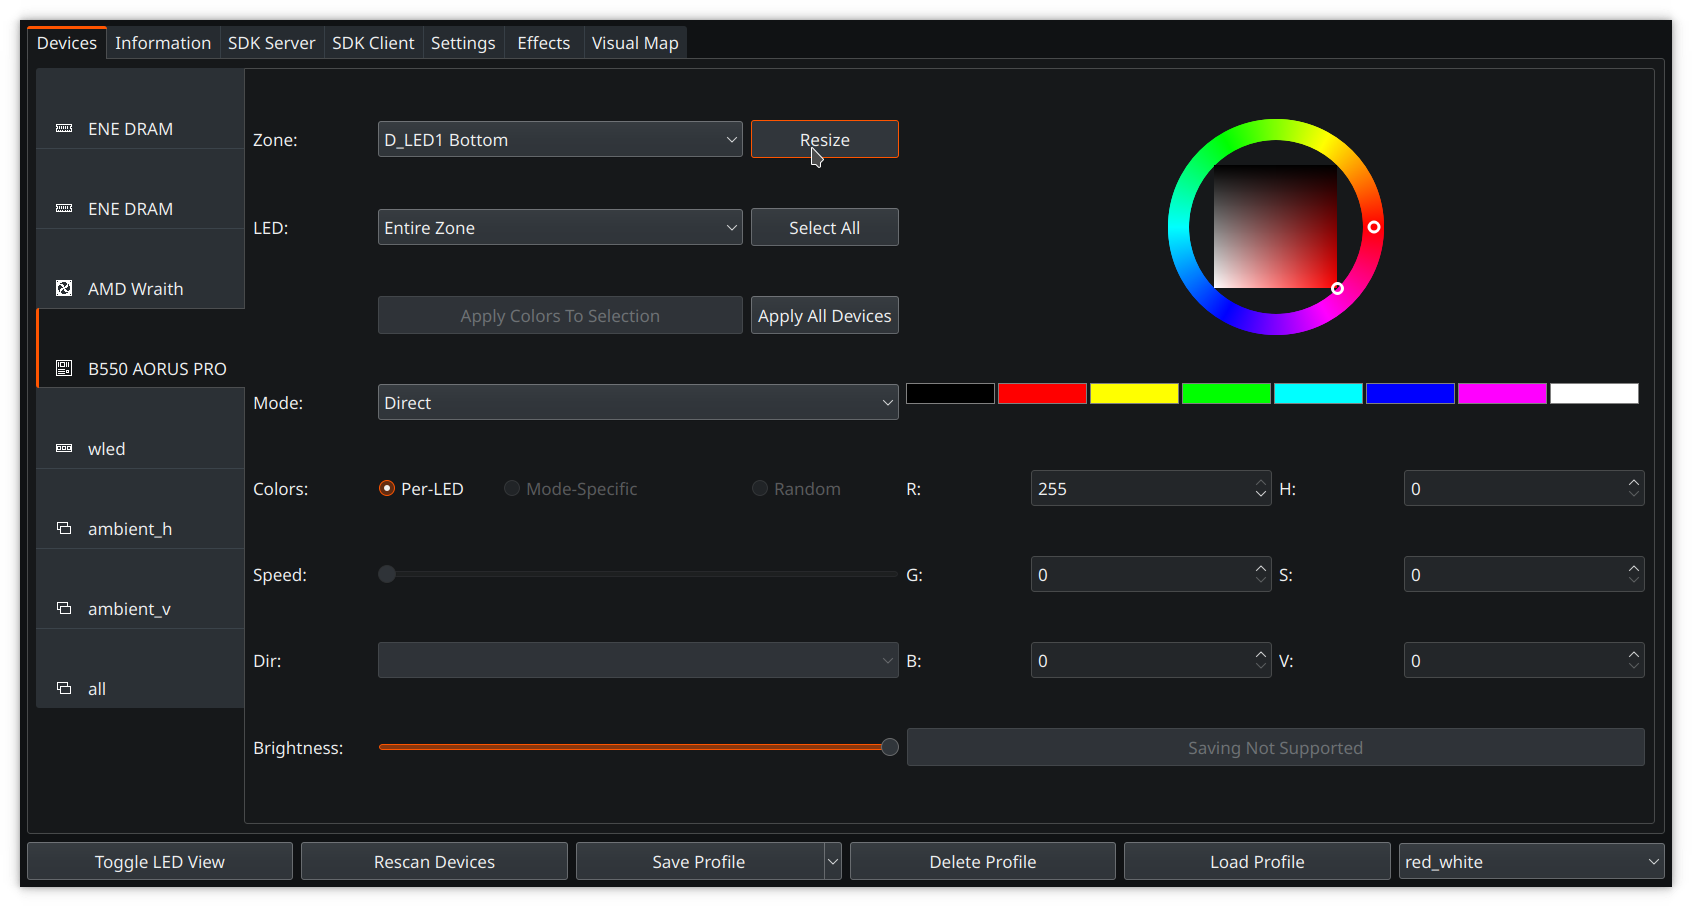 Each coolmoon fan has 16 LEDs, so for me it is 4*16 = 64 plus the sign, makes it overall 81 LEDs. As mentioned above manual control can be done on this page, it is useful for testing if the hardware works correctly.
WLED
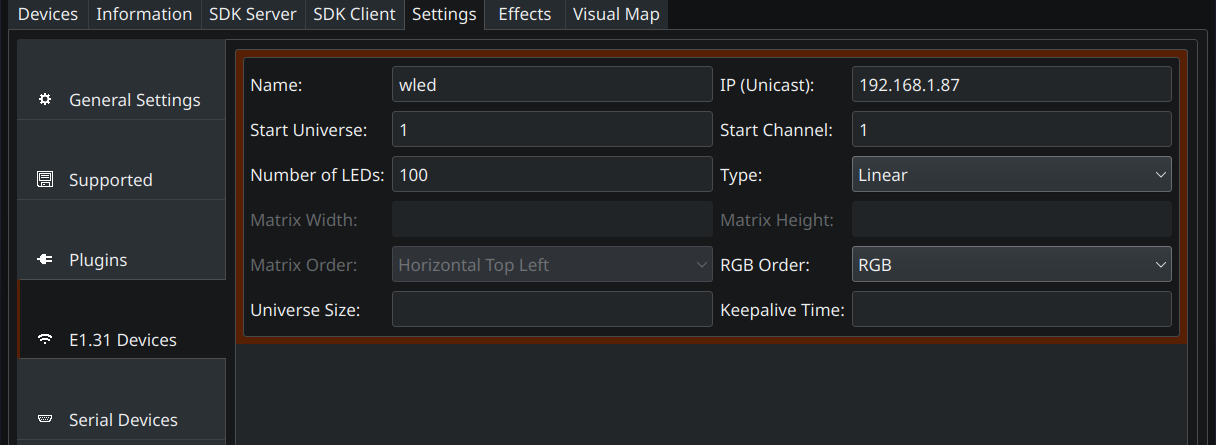
External lights can be also hooked up, here I connect my ESP32 installation with WLED firmware, control data is sent over the WiFi home network.
The DMX protocol also has to be enabled in WLEDs interface, like this:
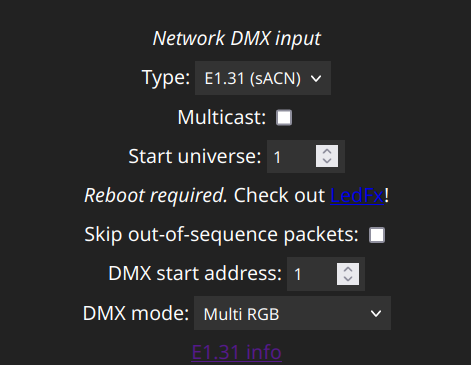
Then it shows up as device and can be controlled as usual. I am using it only as ambient backlight, not for effects.
Positional mapping
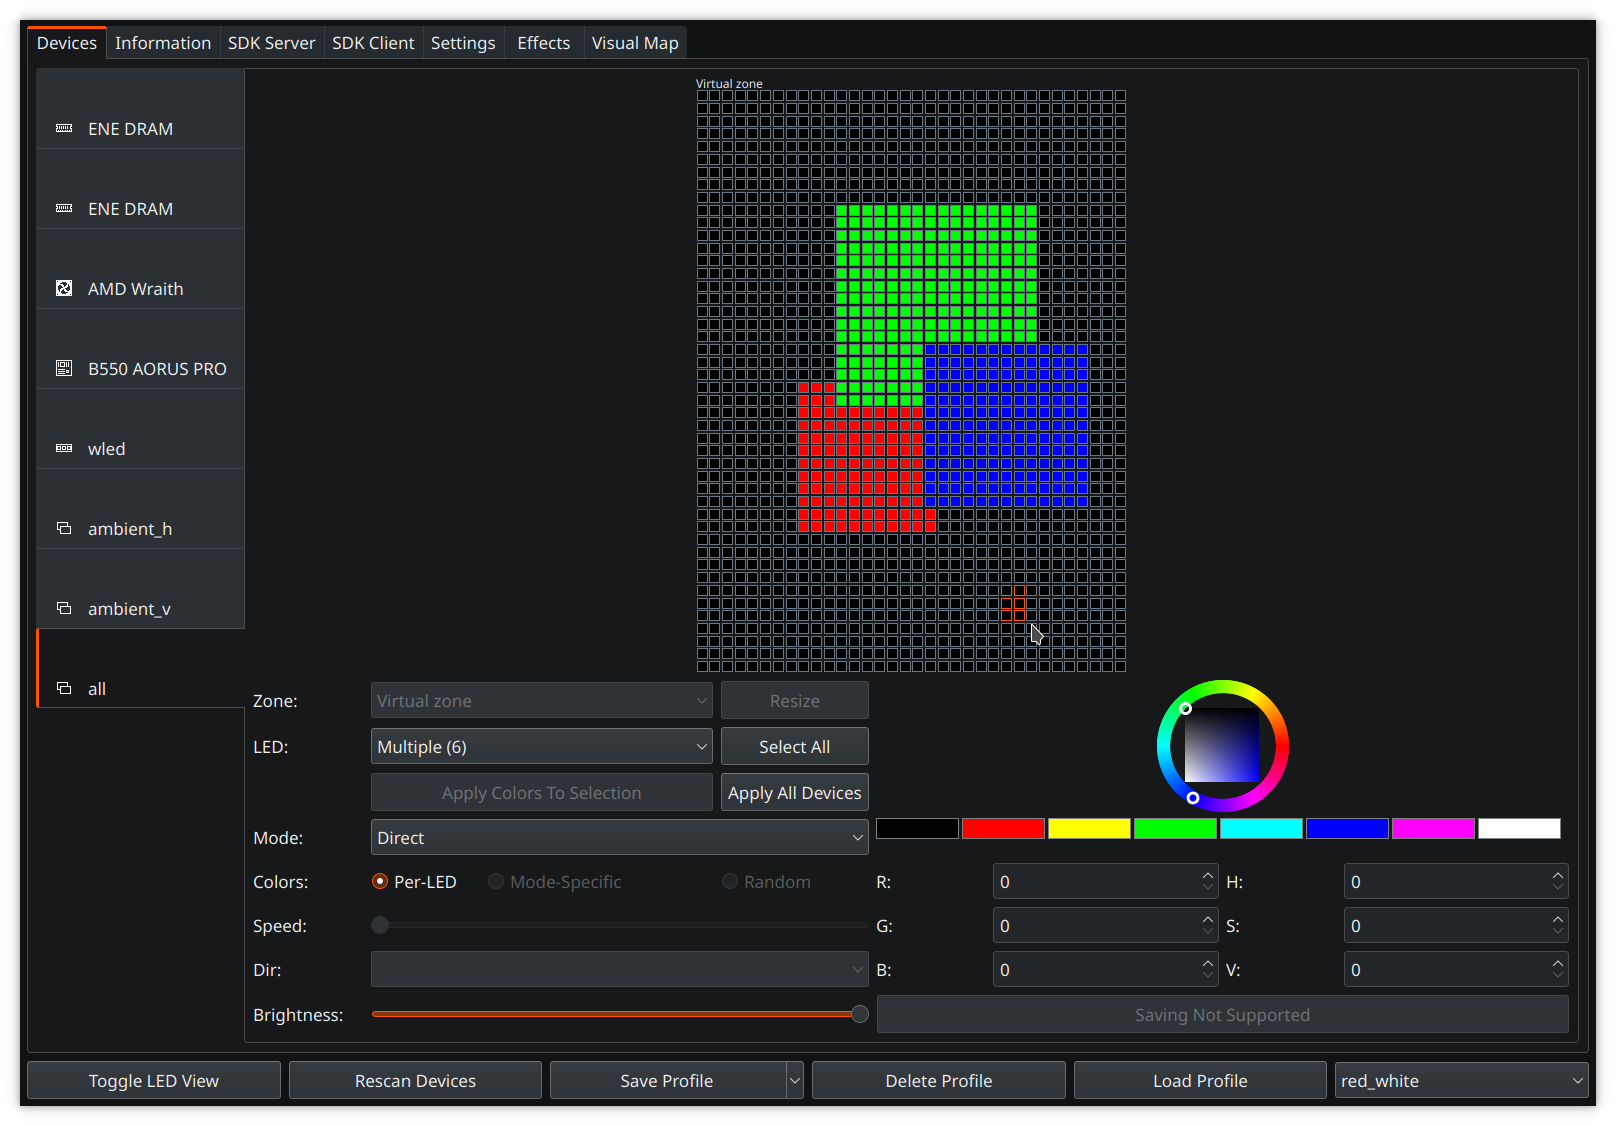
Now to the visual map plugin configuration. It provides a virtual space of custom size to map out the various LED devices and control it as one.
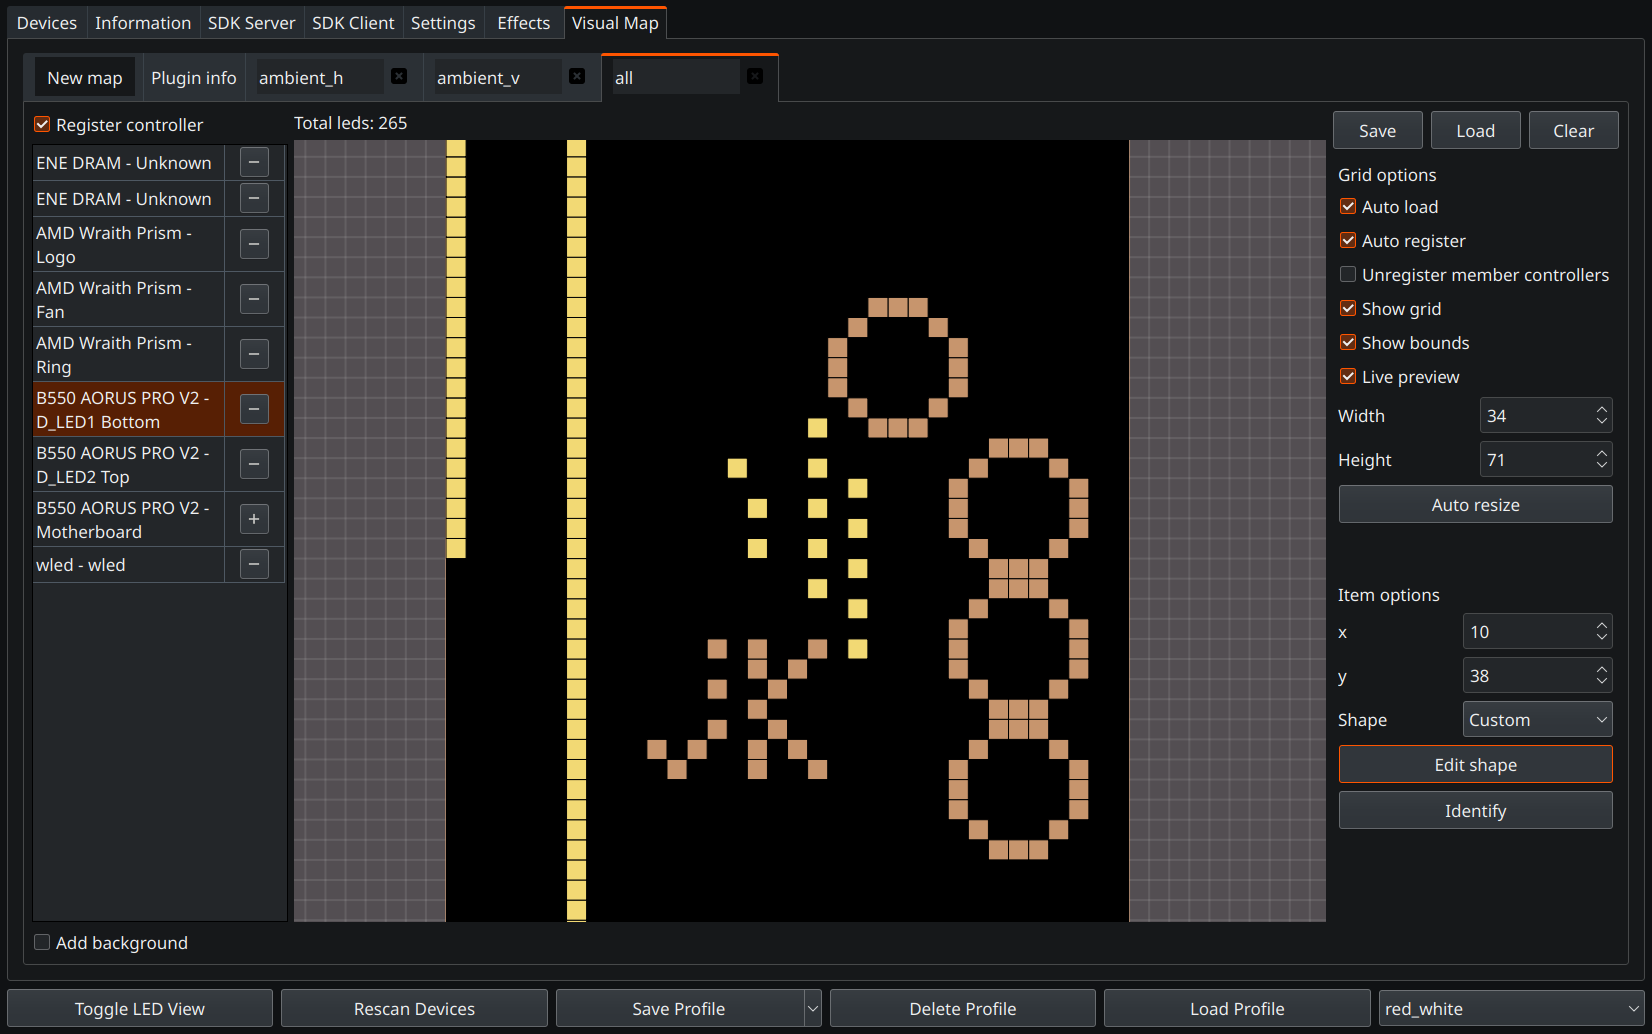 To build a new map first select the devices on the left side with the + buttons. Then they show up in the mid section, can be selected and dragged around.
Make sure there is enough virtual space for your creation with the width/height setting on the right. Also it is advisable to give the mapping a name in the top tab section and save the work regularly (button on the right).
To build a new map first select the devices on the left side with the + buttons. Then they show up in the mid section, can be selected and dragged around.
Make sure there is enough virtual space for your creation with the width/height setting on the right. Also it is advisable to give the mapping a name in the top tab section and save the work regularly (button on the right).
Newly added devices will come in as a line, for more complex shapes like fan click on “edit shape” on the left, this brings up an editor window:
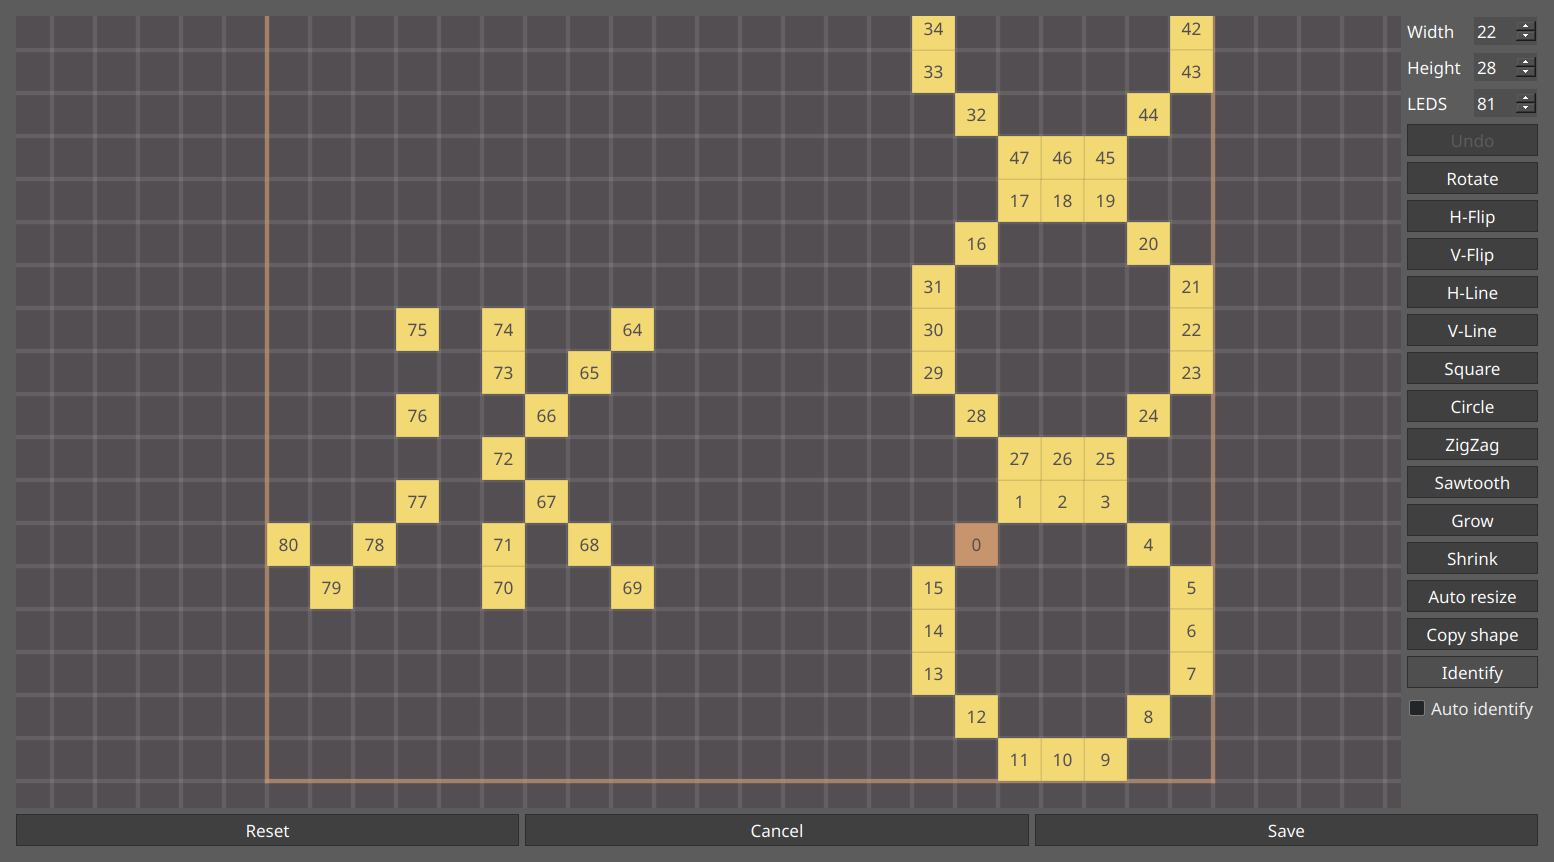 Here each individual LED can be dragged around. Some convenient functions are on the right, select multiple LEDs to use them. Dragging work also for selection and whole groups can be moved around.
It will take some time to arrange all 81 LEDs initially, but trust me - it is worth it.
Here each individual LED can be dragged around. Some convenient functions are on the right, select multiple LEDs to use them. Dragging work also for selection and whole groups can be moved around.
It will take some time to arrange all 81 LEDs initially, but trust me - it is worth it.
After everything is positioned like the hardware, make sure “register controller” is ticked on, so the large virtual device actually appears and can be tested. “Toggle LED View” enabled the visual grid:
Effects
Animations make it even more interesting. First select+add an builtin effect on the left side.
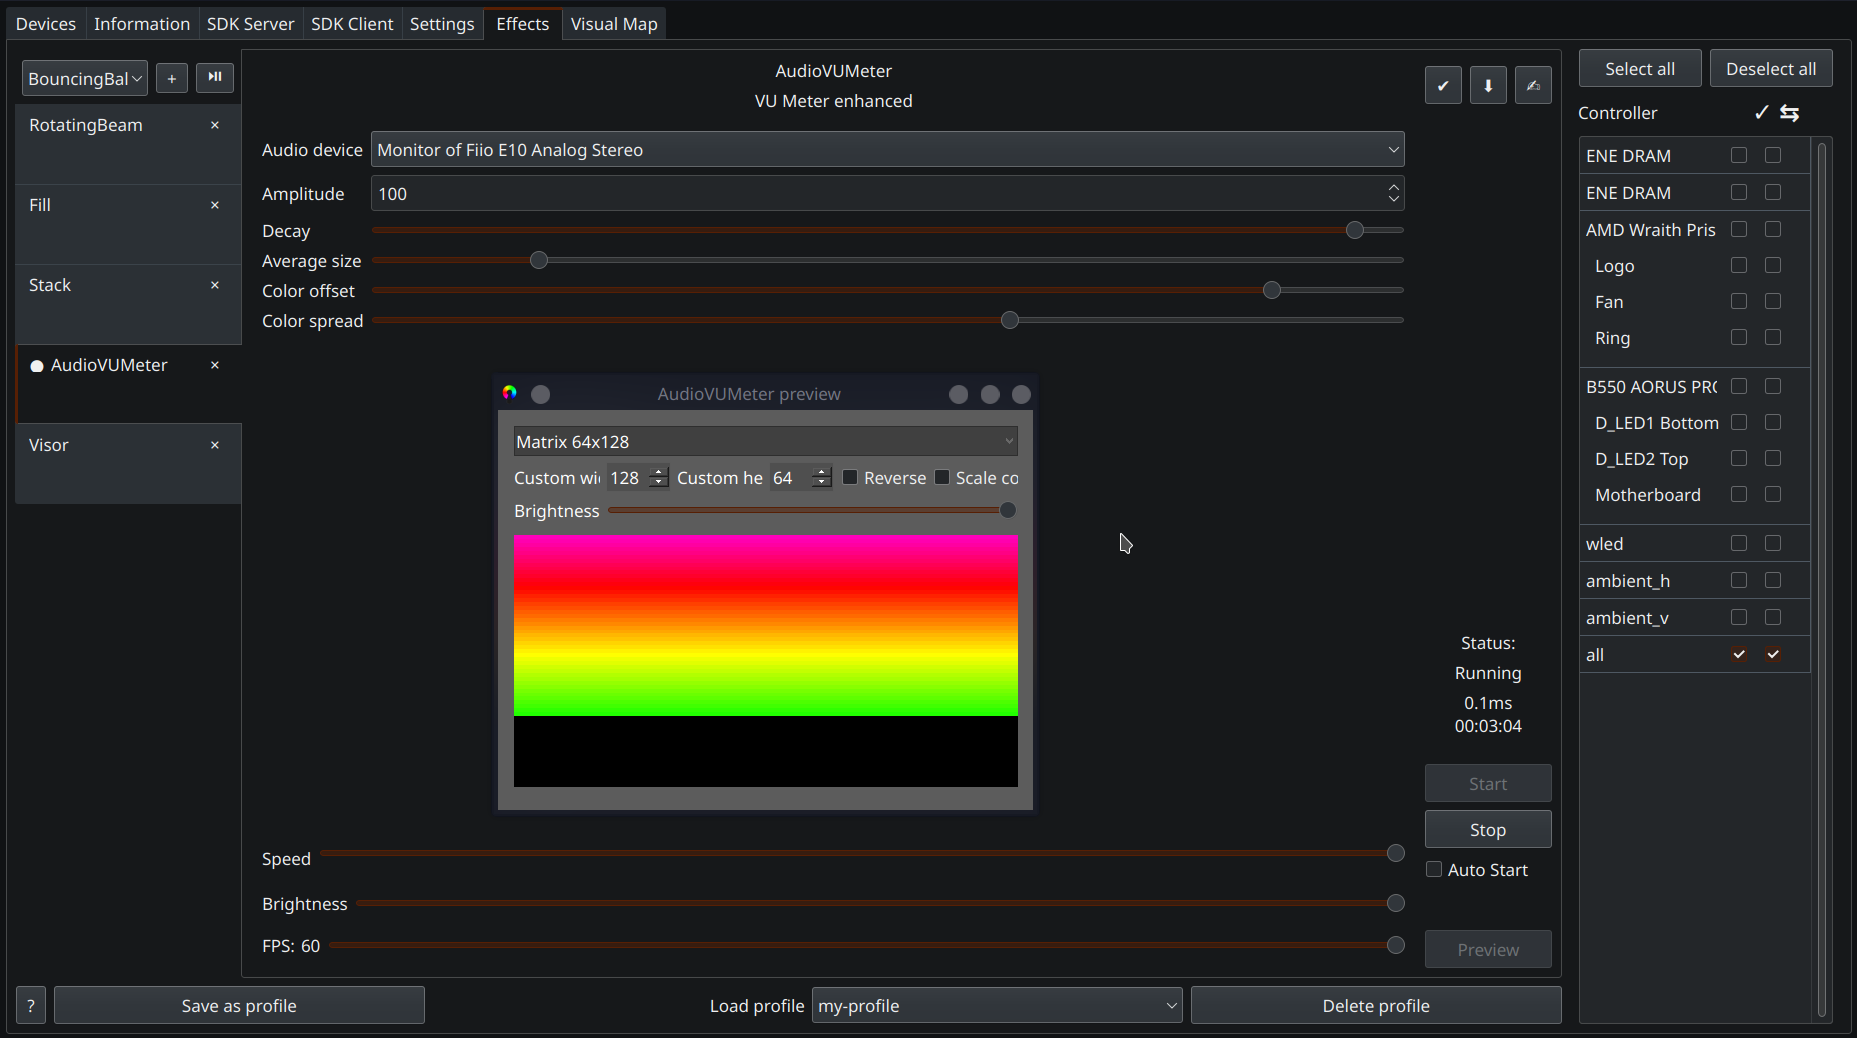 It is normal that nothing happens first, each effect has to be started with the bottom right button. Required is also to enable a controller on the right. Then the effect should be visible, check the live preview either here or in the device or map view. Effect settings can be saved/loaded with the top tight buttons.
Conclusion and Video
Overall I am very pleased with result. I like especially the music visualization effects (VU meter), but see for yourself: